SST has established a full life-cycle quality management system, from substrate to superconducting tape, ensuring the stability and reliability of product and service quality to better meet the application needs of customers.
| Process Inspection
1) Atomic Force Microscope (AFM) is used to inspect the surface roughness of the substrate and isolation layer after electropolishing.
2) X-ray diffractometer is used to measure the phase, crystallization, in-plane and out-of-plane texture, and stress of the coatings to ensure that each film layer meets the requirements of production process.
3) Scanning Electron Microscope (SEM) is used to observe the surface morphology and the cutting edge of each coating layer.
4) Probe-type profilometer is used to measure the thickness of each coating layer.

From left to right: AFM, XRD, SEM, Probe-type Profilometer
| Final Inspection
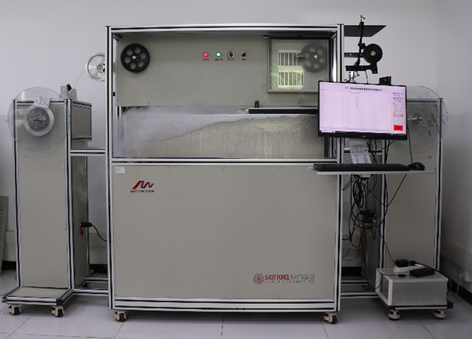
1) The current uniformity of the long superconducting tape is measured with the MCorder HTS tape critical current uniformity testing system.
2)The PPMS comprehensive physical property measurement system is used to carry out low-temperature high-field performance test on the end samples of the long tape at 4.2K, 0-6T (full inspection) and 4.2K, 0-12T (sampling).
3) The geometric dimensions (length, thickness, width) of the tape are measured using rewinders, micrometers, and vernier calipers respectively.

MCorder HTS tape critical current uniformity testing system


 Add:
Add: Tel:
Tel: Email :
  沪公网安备 31011502002867号


